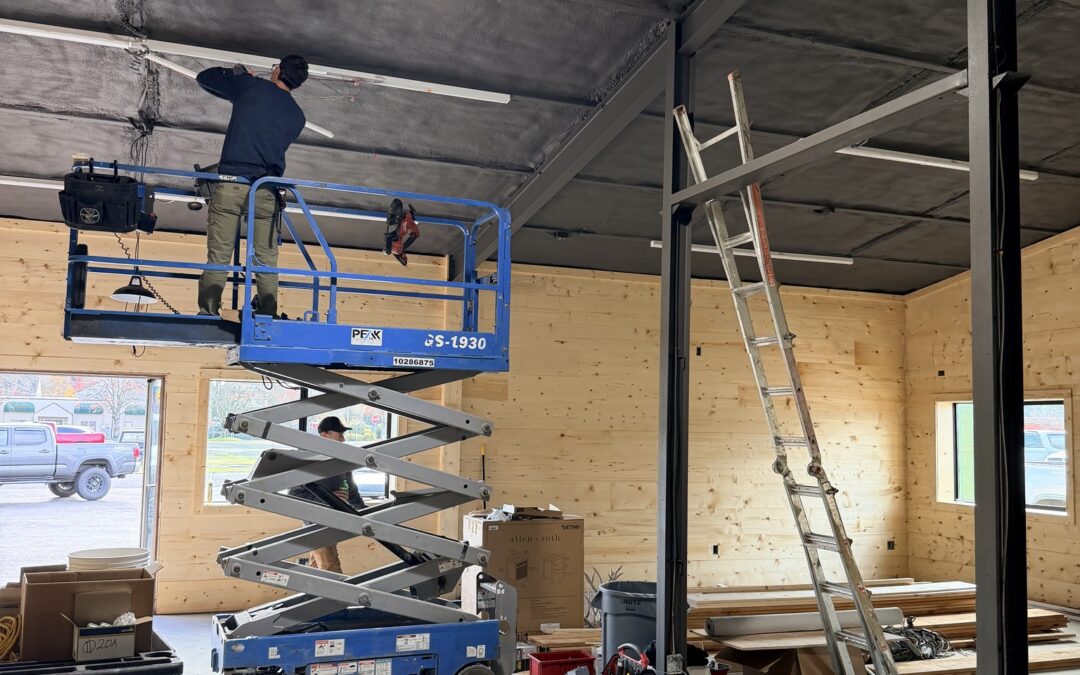
Recessed lighting retrofit installation lets you upgrade your existing light fixtures to modern, energy-efficient LED lights without tearing apart your ceiling. This process works with the light openings you already have, making it a practical way to improve your home’s lighting without major construction work.
In this article, you’ll learn what makes retrofit installation different from new construction lighting, why it saves money and energy, how to complete the process step by step, what problems to watch for, and when to bring in a licensed electrician.
Let’s break down the key points you should consider.
- What is recessed lighting retrofit installation
- Benefits of installing retrofit recessed lighting
- Recessed lighting retrofit installation process
- Common problems during retrofit lighting installation
- When to hire a professional electrician for retrofit lighting
Keep reading to learn how retrofit recessed lighting delivers a cleaner ceiling, lower energy bills, and a faster installation than traditional recessed lighting replacement.
What is recessed lighting retrofit installation
Recessed lighting retrofit installation lets you upgrade old ceiling lights to modern LED fixtures without major construction work. This method uses special adapters that fit into your existing light housings, so you don’t need to cut into walls or ceilings.
Difference between new construction and retrofit lighting
New construction recessed lighting requires access to the area above your ceiling. Workers install housing units between ceiling joists before drywall goes up. This method works best during home building or major renovations when ceilings are open.
Retrofit recessed lights work with finished ceilings already in place. You don’t need to remove drywall or access the space above. These fixtures attach directly to your existing can lights or mount through small holes in your ceiling.
The installation process differs significantly between the two types. New construction takes more time and creates mess from drywall work. Retrofit installations usually take minutes per fixture and create minimal dust or debris.
Cost also varies between these options. New construction lighting requires professional electricians and drywall contractors. Retrofit kits cost less overall because they need fewer labor hours and materials.
How retrofit recessed lights work in existing ceilings
Retrofit LED lights use an Edison screw base that fits into your current light socket. You simply screw the adapter into the existing socket like a light bulb. The LED module connects to this base and clips into place.
Most retrofit kits include spring clips or tension brackets that hold the trim flush against your ceiling. These clips grip the inside of your existing housing to keep everything secure. The design hides the old fixture completely behind the new trim ring.
Some retrofit systems work without existing housings. These models use their own mounting hardware that attaches directly through a ceiling hole. They include built-in junction boxes for wiring connections.
Where retrofit lighting works best in a home
Kitchens benefit most from retrofit can lights because they improve task lighting over counters and islands. You can replace old fixtures that produce yellow or dim light with bright, focused LED options.
Living rooms and bedrooms work well for retrofit installations when you want better ambient lighting. The updates create cleaner ceiling lines and reduce energy bills without remodeling work.
Bathrooms often have older recessed lights that need upgrading. Retrofit fixtures rated for damp locations handle moisture while providing better illumination around mirrors and vanities. Hallways and closets also make good candidates since these spaces typically have basic lighting that benefits from LED efficiency. If your home has multiple rooms with outdated fixtures, lighting installation services can help you plan and execute a whole-home upgrade efficiently.
Benefits of installing retrofit recessed lighting
Retrofit recessed lighting offers practical advantages that improve your home’s functionality and value. You’ll save money on energy costs, avoid messy construction work, and create a cleaner look throughout your spaces.
Modern lighting without major ceiling renovations
Retrofit recessed lighting lets you upgrade your existing fixtures without tearing apart your ceilings. You can switch from outdated bulky fixtures to sleek, modern lights in just a few hours. The retrofit process uses the existing holes in your ceiling, which means no drywall repairs or repainting afterward.
Your installation stays simple because retrofit kits attach directly to the old fixture’s housing. You won’t need to run new electrical wiring through your ceiling or hire contractors for extensive remodeling work. This approach saves you both time and money compared to full renovation projects.
The process creates minimal mess in your home. You avoid the dust, debris, and disruption that comes with cutting new holes or replacing entire lighting systems. Most homeowners complete a single room in an afternoon without professional help.
Improved energy efficiency with LED retrofit lights
LED recessed lighting retrofit cuts your energy bills significantly compared to older incandescent or halogen bulbs. According to the U.S. Department of Energy, LED bulbs use at least 75 percent less energy than incandescent lighting and last 25 times longer, making them one of the most cost-effective lighting upgrades available for residential applications.
A typical LED retrofit bulb draws only 9 to 12 watts versus 65 watts for traditional recessed lights. Most LED bulbs run for 25,000 to 50,000 hours before needing replacement, which means you’ll change bulbs far less often, potentially once every 10 to 20 years with normal use.
These lights also produce less heat than traditional options. Your air conditioning system won’t work as hard during warm months, which adds to your energy savings. The reduced heat output also makes your rooms more comfortable and protects your ceiling materials from heat damage.
Cleaner ceiling appearance and better light distribution
Retrofit recessed lighting creates a streamlined look that eliminates bulky fixtures hanging from your ceiling. The lights sit flush with your ceiling surface, giving you clean lines and a more modern appearance. This design works well in rooms with low ceilings where hanging fixtures might feel cramped.
You gain better control over how light spreads through your rooms. Modern retrofit LED lights come with different beam angles and color temperatures to match your needs. You can choose narrow beams for task lighting or wide beams for general room illumination.
The trim options available with retrofit kits let you customize your lighting’s appearance. You can select from various finishes like white, brushed nickel, or bronze to match your decor. Some retrofit kits include adjustable or directional features that let you aim light exactly where you need it.
Increasing home value with lighting upgrades
Updated lighting ranks high on homebuyer priority lists when they view properties. Your retrofit recessed lighting demonstrates that your home has modern, efficient features. Real estate professionals note that good lighting makes rooms appear larger and more inviting during showings.
Energy-efficient lighting appeals to buyers looking to reduce their utility costs. You can highlight the LED retrofit recessed lighting as a selling point that saves money on electricity bills. Many buyers calculate long-term costs, and efficient lighting adds measurable value to that equation.
The professional appearance of retrofit recessed lighting improves your home’s overall presentation. Well-lit spaces photograph better for listings and create positive first impressions during tours. Pairing these upgrades with broader best electrical safety upgrades further strengthens your home’s value and appeal to informed buyers.
Recessed lighting retrofit installation process
Installing retrofit recessed lighting lets you upgrade your existing ceiling without major construction work. The process involves planning your light placement, preparing ceiling openings, installing the fixtures, and completing final connections.
Planning light layout and spacing
Start by measuring your room and deciding where you want your lights. For general lighting, space recessed lights 4 to 6 feet apart in a grid pattern. Place lights 2 to 3 feet away from walls to avoid shadows.
Consider the ceiling height when planning. An 8-foot ceiling works well with 4-inch fixtures spaced 4 feet apart. Higher ceilings need 5 or 6-inch fixtures with wider spacing.
Check your attic or ceiling space before finalizing your layout. Look for joists, ductwork, and electrical wiring that might block fixture placement. Mark each light location on your ceiling with a pencil.
Calculate how many lights you need based on room size. A basic rule is one light for every 25 square feet of space. Adjust this number based on your lighting needs and fixture brightness.
Cutting ceiling openings and running wiring
Turn off power at the circuit breaker before starting any electrical work. Use a voltage tester to confirm the power is off.
Most retrofit kits don’t need ceiling holes since they attach to existing fixtures. If you’re installing new housings, trace the template that comes with your fixture onto the ceiling. Use a drywall saw or hole saw to cut the opening carefully.
Run electrical cable from your power source to each light location if you’re adding new circuits. Secure the cable with appropriate clips. Leave about 18 inches of wire hanging through each opening for connections.
Check local electrical codes before running new wiring. Many areas require permits for electrical work. Consider hiring a local residential electrician if you’re not comfortable with electrical installations.
Installing retrofit housings or LED retrofit kits
For LED retrofit kits that screw into existing sockets, remove your old bulb first. Screw the adapter into the socket until it’s snug. Push the LED module up into the ceiling opening until the trim clips engage.
If you’re installing new housings, connect the electrical wires inside the junction box. Match black to black, white to white, and green or bare copper to ground. Secure connections with wire nuts.
Push the housing into the ceiling opening. Most retrofit housings have clips that grip the drywall from inside. These clips hold the fixture in place without requiring access to the attic above.
Adjust the fixture so it sits flush with your ceiling surface. Make sure all clips are fully engaged before moving to the next light.
Testing and final trim installation
Restore power at the circuit breaker once all fixtures are installed. Turn on each light to verify it works properly. Check for flickering or buzzing sounds that might indicate loose connections.
Install trim rings or bezels according to the manufacturer’s instructions. Most retrofit trims snap into place with spring clips. Push firmly until you hear or feel the trim lock into position.
Clean any dust or fingerprints from the trim and lens. Adjust the light direction if your fixtures have movable heads. Test your lights again to confirm everything works as expected.
Common problems during retrofit lighting installation
Retrofit installations face specific challenges that can slow down your project or create safety issues. Electrical limitations, physical constraints, and poor planning account for most installation problems.
Limited ceiling space or obstructions
Your ceiling may hide obstacles that complicate your recessed lighting conversion. Joists, ductwork, pipes, and existing wiring often occupy the space where you want to install fixtures.
You need at least 6 to 8 inches of clearance above your ceiling for most standard retrofit kits. Shallow ceiling kits exist for tight spaces, but they limit your options for bulb types and housing styles.
Measure your ceiling depth before you buy fixtures. Use a stud finder and inspect your attic space if possible. Mark the locations of joists and any obstructions on your ceiling before cutting holes.
If you find an obstruction after cutting, you may need to adjust your fixture placement. Some retrofit kits allow for off-center mounting within the existing hole, which gives you flexibility when you encounter unexpected barriers.
Older wiring or electrical capacity issues
Outdated electrical systems create the most serious problems during retrofit installations. Homes built before 1970 often have aluminum wiring, knob-and-tube systems, or circuits that cannot handle additional lighting loads.
Your electrical panel must have enough capacity for the new fixtures. Calculate the total wattage of your planned lights and verify your circuit can support them. Most lighting circuits are 15 or 20 amps.
Old wiring may lack a ground wire, which modern LED retrofit kits require for safety. You cannot simply ignore grounding requirements. Non-grounded fixtures create shock hazards and may void product warranties.
Hire an electrician to inspect your wiring if your home is more than 30 years old. They can identify whether you need circuit upgrades or complete home rewiring services in the affected areas. This inspection prevents failures and safety risks after installation.
Insulation contact and fire safety considerations
Insulation touching non-rated fixtures creates a fire hazard. Standard recessed housings generate heat that insulation traps, which can ignite surrounding materials.
You must use IC-rated fixtures in insulated ceilings. These fixtures have special thermal protection that prevents overheating. Non-IC fixtures require 3 inches of clearance from all insulation.
Check your attic before installation to see if insulation covers your planned fixture locations. Pull back insulation around non-IC fixtures and maintain the required clearance. Never pack insulation against a housing that lacks IC rating.
LED retrofit kits produce less heat than traditional bulbs, but they still need proper ratings. Verify that your retrofit kit matches your housing type and insulation situation.
Choosing the wrong light size or placement
Poor fixture sizing ruins the appearance and functionality of your recessed lighting conversion. Fixtures that are too small look odd and provide inadequate light. Oversized fixtures overwhelm small rooms and create harsh lighting.
| Room type | Recommended size | Spacing |
| Kitchen | 4-6 inches | 4-6 feet apart |
| Living room | 5-6 inches | 5-7 feet apart |
| Bathroom | 4 inches | 3-4 feet apart |
| Hallway | 3-4 inches | 4-5 feet apart |
Place fixtures 18 to 24 inches from walls to avoid creating shadows. Space fixtures evenly based on their beam angle and the room’s purpose.
Your ceiling height affects both fixture size and placement. Rooms with 8-foot ceilings need fixtures spaced closer together than rooms with 10-foot ceilings. Calculate spacing by dividing your ceiling height in half for general ambient lighting.
When to hire a professional electrician for retrofit lighting
Some retrofit projects require professional help to ensure safety and code compliance. You should hire a licensed electrician when your project involves new electrical work, circuit modifications, or outdated wiring systems.
Adding new switches or dimmers
You need an electrician when installing new wall switches or dimmer controls for your retrofit lights. Running wire through walls requires knowledge of electrical codes and proper techniques to avoid damaging existing wiring or structural elements.
Dimmer switches have specific compatibility requirements with LED retrofit lights. An electrician can match the correct dimmer type to your lights and install it safely. They will also ensure the switch box has adequate space and proper grounding.
If you want three-way switches that control lights from multiple locations, professional installation becomes more complex. The wiring configuration requires precise connections that can cause problems if done incorrectly.
Installing multiple lights on new circuits
Your existing electrical circuit might not handle additional lights without overloading. An electrician can calculate the amperage load and determine if you need a dedicated circuit for your retrofit lights.
Adding a new circuit requires work at your electrical panel. This involves installing a new breaker and running wire from the panel to your light locations. Only licensed electricians should open electrical panels due to the risk of serious injury or death. If your panel is outdated, a residential electrical panel upgrade may be necessary before adding new lighting circuits.
Multiple lights on one circuit need proper wire sizing and connections. An electrician ensures each junction box is correctly wired and that all connections meet local electrical codes.
Upgrading old wiring during installation
Homes built before 1990 may have outdated wiring that poses safety risks. An electrician can identify aluminum wiring, knob-and-tube systems, or other old wiring types that need replacement before adding new lights.
Old wiring may lack proper grounding, which is required for modern lighting installations. Your electrician will install grounding wires or recommend upgrading the circuit to meet current safety standards.
Insulation around old wiring can deteriorate over time. An electrician will inspect wire condition and replace damaged sections to prevent electrical fires or shorts.
Ensuring electrical code compliance and safety
Local building codes specify requirements for recessed lighting installation. An electrician knows these codes and will obtain necessary permits for your project. Most areas require permits when adding new circuits or making substantial electrical changes.
NEC Article 410 governs the installation of luminaires, including recessed lighting, and sets requirements for fixture spacing from insulation, wiring methods inside junction boxes, and IC ratings for insulated ceilings. Professional installation ensures your project meets these standards from the start.
Your electrician will test all connections and verify proper operation before finishing the job. They provide documentation of the work for insurance purposes and future home sales. Enrolling in electrical maintenance contracts after installation gives you ongoing peace of mind that your system stays up to code.
According to the U.S. Consumer Product Safety Commission, improperly installed recessed lighting is a documented cause of residential electrical fires, particularly when non-IC-rated fixtures are used in insulated ceilings or when wiring connections are made outside of approved junction boxes. Having a licensed electrician verify your installation eliminates these risks.
Conclusion
Retrofit recessed lighting is one of the most practical lighting upgrades available to homeowners. It delivers the visual and energy benefits of modern LED technology without the cost or disruption of opening ceilings or running entirely new wiring. This guide has covered how the technology works, where it performs best, how to plan and execute an installation, what obstacles to anticipate, and when the scope of the project calls for a licensed electrician.
The efficiency gains alone make a compelling case. Replacing a full room of incandescent can lights with LED retrofits cuts that circuit’s lighting load by roughly 75 percent, and the fixtures themselves rarely need attention for a decade or more.
That said, the line between a simple socket swap and a project requiring professional electrical work is not always obvious before you start. Older homes with aluminum wiring, ungrounded circuits, or panels near capacity need professional assessment before adding any new load. Getting that evaluation upfront prevents the kind of problems that are far more expensive to fix after the drywall goes back up.
Reach out to Peak Electric Group to schedule a consultation and find out exactly what your home needs before your retrofit project begins.
Recent Comments